South Africa’s Premier Coastal Flying Spots
The Bluff: A Local Favorite
“The wind never lies up here,” a veteran pilot once told me on the Bluff’s edge.
The Bluff offers a reliable launch for paragliding in durban. This south-facing ridge delivers the most consistent sea breeze on the coast. The thermals are raw, mixing with the Indian Ocean’s moisture to create a buoyant, restless air column.
You launch into a steep grassy slope that drops to the shipping channel. The landing zone sits far below, near the harbour mouth. Every flight demands attention to your ground speed! A local pilot needs to know:
- The prevailing north-easterly means few dead air days.
- Crosswinds funnel around old military bunkers, causing turbulence.
- Your approach must be precise, as the LZ is small.
I’ve flown here dozens of times. Watching a container ship pass under your feet while you orbit a thermal is a unique sensation. This spot remains the standard for local pilots, a key experience for anyone serious about paragliding in durban.
Umhlanga Cliffs: Scenic Views
Some people come to Umhlanga to see and be seen on the promenade. I come to watch their parasols from four hundred metres up. The cliffs here are Durban’s most photogenic launch, a grassy headland that faces the ocean without obstruction.
The lift is gentler than the Bluff’s rowdy thermals. You trade a bit of intensity for a mile of scenery, and the landing zone is generous enough for a relaxed glide home. For the sightseer pilot, the targets are obvious:
- The Oyster Box’s red and white lighthouse
- The whale watchers clustered at the whalebone pier
- The cane fields rolling inland toward the valley
This is the most civilised form of paragliding in Durban. No shipping traffic, no crumbling bunkers, just the coastal breeze and a smooth touchdown.
Addington Beachfront Launch
Few urban launches in South Africa match the sheer novelty of Addington Beachfront. Here, paragliding in Durban takes on a different rhythm, one powered entirely by the sea breeze that funnels up the Golden Mile. The launch is a sliver of grass between the promenade and the busy road, but that tightness builds character. You run off a low bank, catch the air, and immediately face the Hilton and the SunCoast towers. The landing zone is the beach itself, which demands precise timing. High tide shrinks the sand. Flags fly when swimmers crowd the shore.
What makes this spot distinct is the absence of thermals. You rely on dynamic lift from the wave line, which means no big ears or wingovers here, just solid control. The reward is an unobstructed view of the city’s beach culture. Watch for:
- The kiteboarders slicing through the shore break
- The freighters queuing at the harbour mouth
- The surfers waiting under the pier
For the pilot who wants a direct urban experience, Addington delivers. It is the most accessible of the coastal sites, and the flight often ends with a soft touchdown only metres from the promenade foot traffic.
Tongaat and North Coast Options
Drive past Umhlanga and paragliding in Durban turns into a game of dune and tide. Tongaat’s launch sits above a stretch of coast where the sugar cane meets the sand. The sea breeze arrives early and stays late, giving you a solid window of ridge lift along the shoreline.
Farther north, Ballito and Salt Rock offer higher launch points with panoramic views of the Indian Ocean. Flights here feel uninterrupted. You glide over rocky points and quiet coves, riding the consistent afternoon flow.
- Watch the wind sock at the launch for sudden shifts
- Land on the grass behind the dunes, not the wet sand
- Respect the local pilots who know the tide tables by heart
The North Coast rewards patience. Each site has its own rhythm, and the ocean below never looks the same twice.
Hidden Gems for Advanced Pilots
Few pilots push beyond the familiar names, but the South Coast hides the sharpest edge of paragliding in durban. The hills behind Hibberdene rise straight from the surf, offering a compressed launch window that rewards precise footwork. There is no forgiving beach below, just a narrow strip of white sand and the ocean grinding at its edge.
The thermals stack against the escarpment, and a skilled wing can climb past the coastal haze into a quiet corridor no one else uses. Local knowledge changes everything.
- Check the cloud base before committing to the ridge
- Fly early, before the sea breeze disturbs the landing zone
- Carry a reserve you trust and a radio that works
These sites ask for competence, not courage. They deliver flights that stay in your muscles for weeks. For the advanced pilot, this is the real paragliding in durban, and once you’ve felt it, the crowded launches never quite measure up!
Choosing Your Flight Experience
Tandem Flights with Certified Instructors
The air along Durban’s coastline carries a weight at dawn, a humidity that coats the skin before the sun burns it away. Choosing your tandem flight means selecting a pilot as much as a sky. Certified instructors here do not sell adrenaline; they sell a return to the earth, and that distinction matters.
I have watched them preflight their gliders, checking each line with solemn patience. They speak in low voices about wind speed, cloud cover, barometric pressure. Their expertise is the difference between a memory and a mishap. For anyone considering paragliding in Durban, this quiet competence is what turns fear into focus.
Consider what you require before launching:
1. A full briefing on the flight path and landing procedures.
2. A harness fitted to your body, not a generic strap.
3. A pilot with over a thousand logged flights in this region.
Paragliding in Durban becomes less intimidating when you trust the hands behind you. Trust is earned, not given!
Solo Training Courses
For those who want more than a passenger seat, solo training courses open a different door. Learning to fly in Durban starts on flat ground, not cliffs. Ground handling dominates the first sessions. The wing inflates, collapses, and you learn to feel its moods before leaving the earth. That patience pays off when you finally stand on a launching slope.
A robust course will cover:
1. Ground handling and inflation techniques.
2. Reading wind direction and thermal activity.
3. Emergency procedures and radio protocol.
The path to solo paragliding in Durban typically spans ten days of instruction, whether compressed into a week or stretched over weekends. Most students are surprised by the physical toll. Your shoulders ache, your neck strains, your brain processes constant decisions. But when you complete your first unassisted flight, the feeling is quiet, not loud. You float, and the city becomes a green and blue map below.
Thermal vs Coastal Flying
Somewhere around 80% of Durban flights hug the coastline on sea breeze days. The rest climb inland where the sun heats the ground unevenly and rising air forms columns. This is the choice every pilot must make before sunrise.
Coastal flying is steady. The wind arrives from the Indian Ocean, smooth and constant, pressing against the bluffs and holding the wing against the ridge. You trace the shoreline, gaining modest height and maintaining it for hours. The rhythm is repetitive and calming.
Thermal flying is less predictable. Inland, warm air rises in bursts from bare fields and rock faces. You find a column and circle inside it, climbing far above the city. The scale changes quickly. Durban spreads out below, the streets and rooftops visible.
The choice comes down to what you want from a morning. Paragliding in Durban offers both skies, and neither is better.
Duration and Distance Covered
The duration of a paragliding in Durban flight depends on the pilot’s intention. Some launch for a quick hop, while others stay airborne for the better part of a morning. Sessions range from 20 minutes to over two hours, and the distance covered changes accordingly.
A short flight might cover just one kilometer along the shoreline. A sustained soaring session can push 30 kilometers north along the ridge. I often ask clients what they value before we leave the ground.
- Brief hops, 15 to 25 minutes, staying near launch
- Standard crossings, 45 to 60 minutes, covering the bluff
- Extended runs, 90 minutes plus, venturing far up the coast
Weather, wind strength, and wing size all influence these numbers. Matching your expectations to the conditions determines the success of any session.
Pricing Packages and Deals
Most people assume paragliding in Durban carries a premium price tag, yet the reality surprises them. Pricing follows a transparent structure that rewards planning and flexibility.
A typical menu of options:
– Solo intro flight for the curious
– Standard tandem for first timers
– Extended session for those who want more airtime
Each tier includes the necessary gear and a certified pilot. Deals surface in the quieter months, and group bookings often unlock a better rate. Some operators offer combined packages, pairing a short instructional hop with a longer flight, which delivers better value for visitors who want the full experience.
The final figure can shift by hundreds of rands depending on what is itemised separately, making paragliding in Durban more achievable than the brochure suggests.
Understanding Wind and Weather Patterns
Seasonal Wind Directions in KZN
The South Easterly, locally dubbed the ‘Cape Doctor’, influences roughly 60% of KZN’s summer flying days. Yet this prevailing wind coexists with winter’s South Westerly and the dry Berg wind. Paragliding in durban demands respect for the sea breeze cycle, which strengthens by midday.
- A South Westerly offers clean lift along the Bluff’s escarpment.
- A North Easterly requires careful ridge positioning around the Umhlanga headland.
- A Berg wind, a dry offshore foehn, creates rapid sink and surface turbulence.
The inversion layer often caps thermal development, so early morning launches or afternoon glass-offs provide predictable windows. These seasonal shifts are central to consistent flight planning. Monitor synoptic charts alongside local forecasts.
Ideal Wind Speeds for Launching
Wind speed matters more than wind direction when you are standing on a launch with your wing half-inflated. Paragliding in durban rewards pilots who read the numbers before they read the sky. The sweet spot for most coastal sites sits between 15 and 25 km/h. Below that, you are running downhill with a wing that refuses to pressurise. Above that, you are fighting a force that does not care about your schedule.
Gust factor is the sneaky variable. A steady 20 km/h is lovely. A 20 km/h wind with 10 km/h gusts makes launching unpredictable. Check the wind meter, then check it again.
Ideal conditions for launching:
- Steady wind between 15 and 25 km/h
- Gust spread under 5 km/h
- Wind direction within 30 degrees of the launch face
Paragliding in durban demands this discipline. The sea breeze does not negotiate.
Reading Cloud Formations
I read clouds before I check the wind meter. For paragliding in durban, their shapes, height, and motion reveal conditions that a ground-level instrument cannot show.
Cumulus clouds with flat bases mark where air rises steadily. Torn edges underneath signal turbulence inside the column. When high cirrus clouds arrive in the morning, a cold front is often within 24 hours, so adjust your flight plan.
Cloud shadows crossing the ocean surface show wind speed at altitude. Compare that with the wind meter on the cliff to see whether the lower and upper wind layers agree.
Pay attention to:
– A broken cloud deck moving inland quickly, signalling stronger winds to come
– Lenticular clouds over the hills, indicating strong mountain waves and a reason to remain grounded
These checks give a practical picture of the air column.
Avoiding Turbulence and Gusts
Gusts are the atmosphere’s way of testing your reflexes. In Durban, the Indian Ocean breeze stays reliable until it does not. A dark patch racing across the water signals a gust front. That is your cue to brace.
Turbulence forms where the south-westerly meets warm air rising off the dunes. The collision shakes your lines. Watch the seabirds. When gulls flap furiously instead of gliding, the air is unstable.
Here is what I check before committing:
– Wind meter on the cliff versus wind speed offshore
– Time since the last gust front
– Behaviour of pilots already airborne
A steady 15 km/h breeze at launch can become 30 km/h gusts at 100 metres. That is paragliding in Durban. Respect the air.
Best Time of Day for Calm Air
At dawn, the air along Durban’s coast is still. The temperature gradient between land and sea has not yet sharpened, so the sky stays quiet. I have launched before 8am many times, and that calm window offers the most predictable lift. This is why paragliding in Durban often begins with sunrise for experienced pilots.
By mid-morning, the sun heats the sand and the city’s dark surfaces. That warmth pulls air inland, creating a steady onshore flow. For paragliding in Durban, the calm hours are precious because they seldom last beyond 9am. A gentle 8 knot breeze at launch can become a stiff 18 knots by 10am.
The late afternoon lull is fickle. The ocean breezes reassert themselves without warning. Understanding this daily rhythm matters more than chasing a single forecast. A falling barometer overnight means restless air, while a steady barometer suggests calm.
Essential Gear and Safety Measures
Modern Paraglider Equipment Explained
Modern paragliding equipment has evolved into a combination of strong fabrics and precise buckles. For paragliding in Durban, your wing is the primary component, but the harness and reserve chute deserve equal attention.
- A certified wing matched to your weight
- A harness with back protection
- A reserve parachute packed by a professional
- A helmet with proper fit
A vario and GPS provide useful data, but they do not replace judgment. Safety measures begin before launch: inspect lines, check buckles, and respect the sea breeze. Durban’s coastal thermals require clear heads and calm hands. No gadget fixes poor decisions.
Helmet and Harness Fitness
Fitness determines your paragliding in Durban experience more than any gadget. A tired pilot makes slow decisions. The sea breeze does not wait for anyone.
Your helmet and harness form the physical link between you and the wing. A proper helmet fits snugly without pressure points. A harness with back protection cushions rough landings. Both must be checked before every flight.
- Leg strength for launch and landing
- Core stability for weight shift control
- Shoulder endurance for sustained flying
Paragliding in Durban rewards pilots who train regularly. The coastal thermals demand a body that reacts without hesitation.
Instructor Ratings and School Accreditation
The margin between a memorable flight and a misfortune in paragliding in Durban often comes down to the gear you trust and the school that trained you. Reserve parachutes must be repacked on schedule. Karabiners need visual inspection for hairline fractures. A school that skips these checks is a school you should walk away from.
Instructor ratings matter in South Africa. The South African Hang Gliding and Paragliding Association (SAHPA) governs accreditation. A valid SAHPA rating means the instructor passed rigorous examinations. School accreditation verifies that equipment, insurance, and training protocols meet national standards.
- Confirm the school’s SAHPA membership before booking
- Ask when the reserve parachute was last repacked
- Request proof of insurance coverage for tandem flights
These details separate genuine operators from unscrupulous ones. When you choose paragliding in Durban, pick a school that volunteers this information without prompting. The good ones always do.
Required Licenses and Permits
The legal framework for paragliding in Durban is stricter than most visitors expect. The South African Civil Aviation Authority mandates a valid paragliding licence before you launch. This licence is issued through SAHPA after you pass practical and theoretical exams. Without it, you are flying illegally!
Site access is a separate matter. The Bluff and Umhlanga launch points sit on municipal and private land. Pilots need a current site permit, often included in a school’s annual membership. Airspace restrictions near Virginia Airport also require a radio or a pre-approved flight plan.
Before you fly, the essentials are:
- Your SAHPA licence is valid and on your person
- Your site permit covers the specific launch point
- Your weather brief came from an approved source
This checks and balances system keeps the sport legal and disciplined.
Emergency Procedures and Reserve Chutes
Your reserve chute is the only piece of gear that can save your life when the canopy fails. For paragliding in Durban, where coastal thermals can collapse a wing without warning, that chute must be packed correctly and reachable within seconds.
Emergency procedures follow a fixed order. You stabilise the glider, check altitude, then throw the reserve if the descent does not correct. Drills make this sequence automatic.
A proper pre-flight safety check covers:
- Reserve pin placement and handle access
- Harness buckles and carabiner locks
- Radio function and battery level
- Wind direction and launch clearance
Skipping this routine has ended more than one flight at the Bluff. Gear failure is rare in paragliding in Durban, but the reserve chute only works if you have practised the motion of throwing it. I have watched pilots hesitate at the critical moment. Training removes that hesitation.
Pre-Flight Checks and Maintenance
Before every flight, I run my hands over the harness webbing and inspect the carabiners for hairline cracks. A torch beam catches surface wear that daylight hides. The glider fabric gets the same attention, each seam and cell opening checked against a mental list that has grown longer over the years.
Maintenance for paragliding in durban demands a specific rhythm. Salt air corrodes metal fittings faster than inland conditions, and UV radiation weakens fabric over time.
- Check line tension and sheath integrity after every 50 flights
- Rinse the canopy with fresh water after coastal sessions
- Inspect risers for fraying at connection points
Pre-flight checks extend beyond the equipment itself. I verify my hook knife sits within reach and that the speed bar glides freely through its pulleys. The routine is not bureaucratic. It is the difference between a controlled descent and a mystery you never want to solve.
Preparing for Your First Flight
Physical Fitness Requirements
Physical fitness for a first paragliding flight in Durban is less about athletic prowess and more about baseline mobility. Launching from coastal dunes requires no marathon level conditioning. However, you need enough core strength to manage a harness and enough stamina for a short walk to launch sites.
Consider these basics before you book:
– Ability to jog 50 meters with light gear
– Comfort lifting 10 kilograms overhead
– Balance on uneven ground without assistance
Paragliding in Durban suits most able adults. The control bar and wing respond to subtle movements, not power. A moderate fitness level reduces fatigue during your first flights. This keeps your attention on the air.
What to Wear and Bring
The Indian Ocean breeze carries salt and the promise of lift, but it also carries a sharp chill at altitude. Preparing for your first flight means dressing for the sky, not the car park. You will shed layers quickly once the sun climbs, so wear breathable fabrics you can strip off between launches.
Choose closed-toe athletic shoes with a grippy sole. The trails leading to launch sites can be sandy, and your togs and towel belong back at the beach. Sunglasses are essential, though bring a strap to keep them on during the flight. A light windbreaker offers protection without restricting movement.
For your first paragliding in Durban experience, keep gear minimal. The harness has limited storage, and excess weight becomes a distraction. Packing light frees your focus for the sensation of the wing above you.
- Long pants to protect legs during launch
- SPF 50 sunscreen, applied before arriving
- Water bottle with a carabiner clip
- Phone with emergency contacts saved
Each item earns its place through utility. That is the standard for paragliding in Durban, where the weather changes quickly and your attention belongs to the thermals.
The Pre-Flight Briefing
The pre-flight briefing is where the sky becomes a language. Your instructor will walk through the commands that keep you safe, from weight-shift cues to the moment you run toward the edge. It is not a lecture. It is a conversation with gravity.
For paragliding in Durban, the briefing includes local wind quirks that no manual captures. I have watched students lean in when the instructor explains how the bluff’s updrafts behave in the morning heat, and what the ocean haze means for your landing approach. Listen for the rhythm of the instructions, not just the words.
Key elements covered in every briefing:
– Hand signals for turning and braking
– The stall point warning
– Landing approach markers
– Emergency reserve activation steps
When your instructor says “ready,” they mean the wing, the wind, and your mind are aligned. Trust that moment.
In-Flight Sensations and How to Manage
The ground falls away and your stomach files an immediate protest. That lurch is your brain recalibrating to a world without floorboards. Keep your eyes on the horizon, not the drop below. The wing answers every input, but only if you breathe through the first ten seconds.
The air over Durban has its own pulse. It arrives as a series of gentle nudges, the same updrafts that make paragliding in durban so distinctive. Let your body go slack from the hips down. Tension creates pendulum swings. Relaxed legs absorb the motion instead of amplifying it.
Sensations to expect on your first paragliding in durban flight:
- A weightless pause at the moment of launch
- Pressure changes in your ears as you climb
- A soft surge when you hit a thermal edge
None of these require action. They require acknowledgment. The wing knows its job. Stay present and trust it.
Landing Zones and Techniques
The landing zone is where the day’s courtesy matters. You will share the air with kites, gulls, and other wings. A good landing starts with a decision made five metres up, not five centimetres. The flare is a gentle lift of the hands, timed to the ground’s arrival, and you will rehearse it until it feels like a reflex.
Approaching a Durban field, you read the wind sock, the shadows, and the pilot ahead of you. The main zones each have their personality:
- Addington Beach asks for a steady glide over the promenade before a soft touchdown on sand.
- The Bluff’s field rewards a straight approach; the fences are unforgiving.
- Umhlanga’s strip tempts you to admire the view, but the crosswind near the trees demands attention.
Your instructor will guide the pattern. Paragliding in Durban becomes graceful when you trust that guidance and commit.
Capturing the Experience: Photo and Video Tips
Preparing for your first paragliding in Durban begins with mental preparation as much as physical. The coastal thermals demand calm attention. An instructor checks the harness and explains the sequence:
- Brake length set for your reach
- Reserve handle within easy grip
- Radio channel confirmed with the ground crew
Settling your mind before your feet leave the ground becomes the primary task.
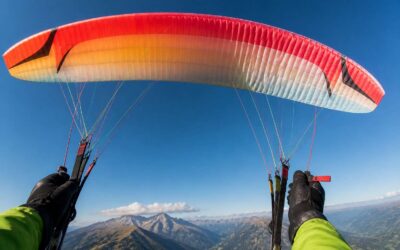
Capturing the experience requires deliberate choices. A helmet mounted camera produces stable footage. A wide angle lens includes the coastline naturally. Keeping a spare memory card in a pocket ensures no missed moments. The best shots occur when the camera fades from thought and the lift takes over.


0 Comments